There are many queries on the internet asking how to connect your .PK domain registered through PKNIC to Cloudflare as many users were met with a common error “[yourdomain.pk] is not a registered domain.” This guide will also apply to .com domains which are getting the same error while connecting them on Cloudflare.

I came across this error when trying to connect my own .PK domain registered through PKNIC to Cloudflare and there was no solution to the problem on Google or YouTube. However, I was able to solve the problem and decided to make this post to help others going through the same problem.
How to connect .PK domain from PKNIC to Cloudflare?
The steps outlined below will help you to connect your .PK domain from PKNIC to Cloudflare:
Step 1:
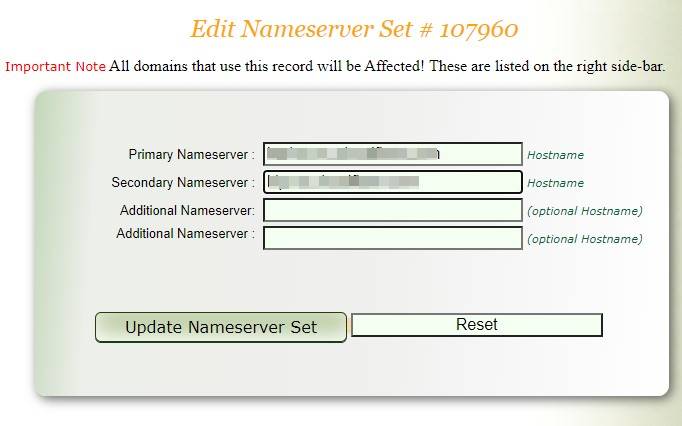
Login to PKNIC and select the domain you want to connect with Cloudflare and assign nameservers to the domain. This will be the first step to connecting the domain to Cloudflare as it will not pick up the domain unless primary nameservers have been entered. Enter the following nameservers to the .PK domain you want to connect to Cloudflare:
- Primary Nameserver: ns1.cloudflare.com
- Secondary Nameserver: ns2.cloudflare.com
The screenshot is attached below for reference. Now you need to wait a few hours and give your domain registrar some time to let the changes come into effect. It usually takes 4 to 5 hours for most domain registrars but it might take longer in some cases. It bears mentioning that these are temporary nameservers which will be replaced by unique nameservers provided by Cloudflare.
Step 2:
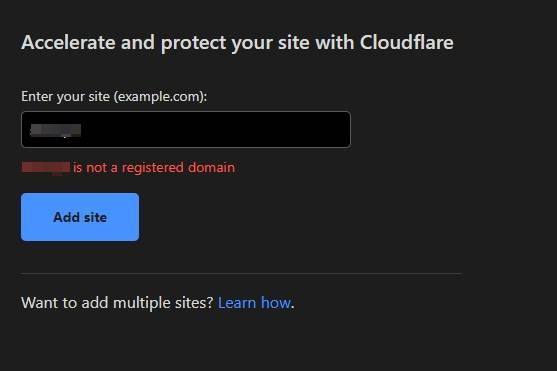
Login to Cloudflare and select ‘Add Site’ option and type in your domain name without www (eg. yourdomain.com). Refer to the screenshot below as an example.
Step 3:
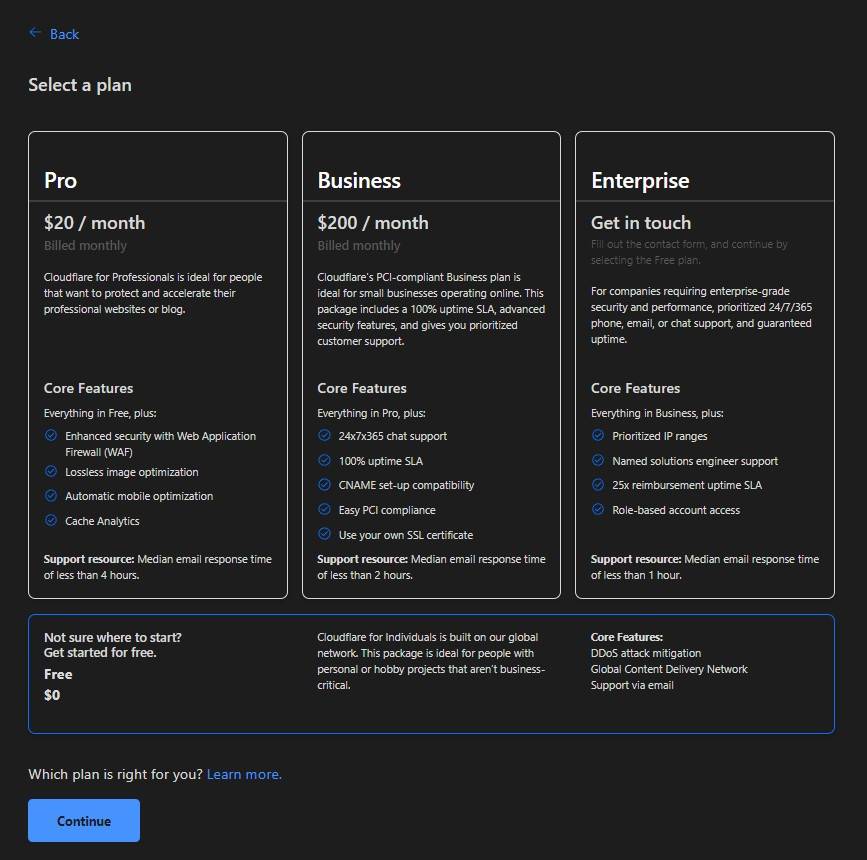
Cloudflare should not accept your domain without any error. You can now select your plan and move forward with the setup. Cloudflare will now ask you to enter the DNS record provided by your hosting provider. Complete the requirements and click on continue.
Step 4:
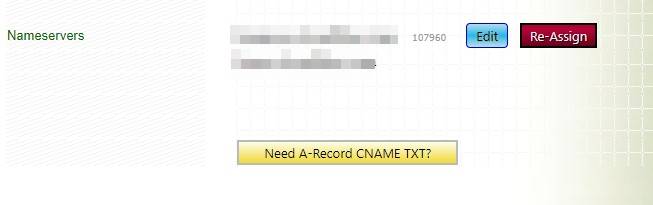
In this step, Cloudflare will ask you to replace the nameservers you placed in your domain during Step 1. Cloudflare will provide a set of new nameservers to you and ask you to add these to your domain. Complete the step and click on Done.
Step 5:

Configure Cloudflare the way you want and you’re done.
Read more: Snapdragon 898 Expected to Launch on November 30.
Follow INCPAK on Facebook / Twitter / Instagram for updates.